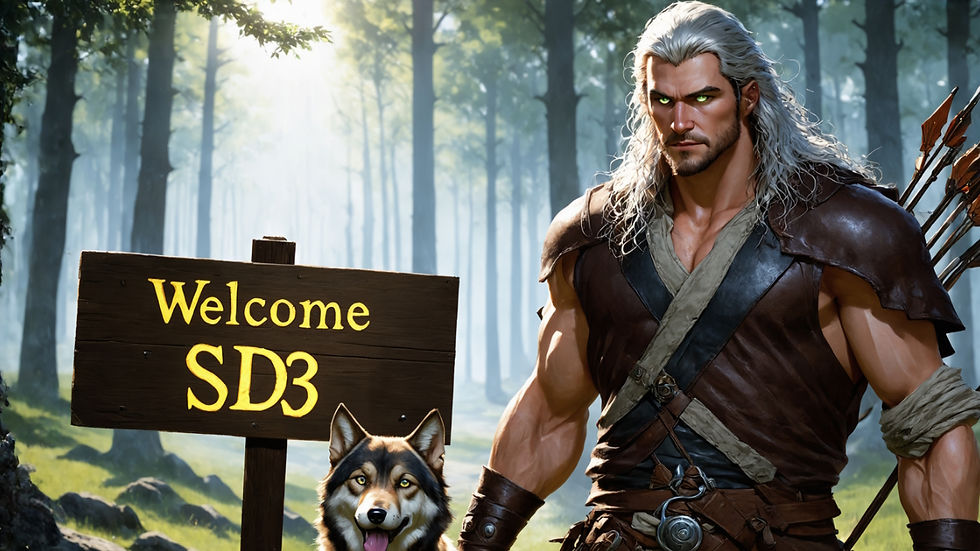
Zero to Hero Stable Diffusion 3 Tutorial with Amazing SwarmUI SD Web UI that Utilizes ComfyUI
- Furkan Gözükara
- Jun 25, 2024
- 9 min read

Updated: Jul 1, 2024
Zero to Hero Stable Diffusion 3 Tutorial with Amazing SwarmUI SD Web UI that Utilizes ComfyUI
Do not skip any part of this tutorial to master how to use Stable Diffusion 3 (SD3) with the most advanced generative AI open source APP SwarmUI. Automatic1111 SD Web UI or Fooocus are not supporting the #SD3 yet. Therefore, I am starting to make tutorials for SwarmUI as well. #StableSwarmUI is officially developed by the StabilityAI and your mind will be blown after you watch this tutorial and learn its amazing features. StableSwarmUI uses #ComfyUI as the back end thus it has all the good features of ComfyUI and it brings you easy to use features of Automatic1111 #StableDiffusion Web UI with them. I really liked SwarmUI and planning to do more tutorials for it.
🔗 The Public Post (no login or account required) Shown In The Video With The Links ➡️ https://www.patreon.com/posts/stableswarmui-3-106135985
0:00 Unveiling Stable Diffusion 3 (SD3) and SwarmUI: A comprehensive overview of the tutorial's contents
4:12 Delving into SD3's architectural framework and key features
5:05 Decoding the various model files associated with Stable Diffusion 3
6:26 Step-by-step guide for downloading and setting up SwarmUI on Windows, compatible with SD3 and other Stable Diffusion models
8:42 Optimal folder path selection for SwarmUI installation
10:28 Troubleshooting installation errors: Identification and resolution techniques
11:49 Post-installation: Initiating SwarmUI usage
12:29 Customizing SwarmUI settings and theme preferences (dark, white, gray)
12:56 Configuring SwarmUI for PNG image output
13:08 Locating detailed descriptions of settings and configurations
13:28 Acquiring and implementing SD3 model on Windows
13:38 Utilizing SwarmUI's model downloader utility
14:17 Establishing model folder paths and integrating existing model directories in SwarmUI
14:35 Elaborating on SwarmUI's Root folder path concept
14:52 Exploring the necessity of SD3's VAE download
15:25 Navigating SwarmUI's Generate and model section for image creation and base model selection
16:02 Configuring and understanding image generation parameters
17:06 Identifying optimal sampling methods for SD3
17:22 Comparative analysis of SD3 text encoders
18:14 Inaugural image generation using SD3
19:36 Techniques for image regeneration
20:17 Accessing image generation metrics: Speed, step rate, and additional data
20:29 SD3's performance on RTX 3090 TI: Image generation speed
20:39 Monitoring VRAM usage on Windows 10
22:08 Evaluating and contrasting various SD3 text encoders
22:36 Implementing FP16 version of T5 XXL text encoder as an alternative to the default FP8 version
25:27 Assessing image generation speed with SD3's optimal configuration
26:37 Exploring SD3's superior VAE compared to previous Stable Diffusion models: 4 vs 8 vs 16 vs 32 channels
27:40 Sourcing and acquiring top-tier AI upscaler models
29:10 Leveraging refiner and upscaler models to enhance and enlarge generated images
29:21 SwarmUI restart and initialization procedures
32:01 Locating generated image storage directories
32:13 Exploring SwarmUI's image history functionality
33:10 Comparative analysis of upscaled images
34:01 Batch downloading of all upscaler models
34:34 In-depth exploration of the presets feature
36:55 Implementing continuous/infinite image generation
37:13 Addressing non-tiled upscale-related issues
38:36 Evaluating tiled vs non-tiled upscaling for optimal results
39:05 Importing 275 SwarmUI presets (derived from Fooocus) and associated coding scripts
42:10 Examining the model browser feature
43:25 Generating TensorRT engine for significant speed enhancements
43:47 SwarmUI update process
44:27 Advanced prompt syntax and features
45:35 Implementing Wildcards (random prompts) functionality
46:47 Accessing comprehensive image metadata
47:13 Comprehensive guide to powerful grid image generation (X/Y/Z plot)
47:35 Integrating downloaded upscalers from zip files
51:37 Monitoring server logs for real-time updates
53:04 Resuming interrupted grid generation processes
54:32 Accessing and utilizing completed grid generations
56:13 Illustrating tiled upscaling seaming issues
1:00:30 Comprehensive guide to image history feature
1:02:22 Direct image deletion and starring functionalities
1:03:20 Implementing SD 1.5, SDXL models, and LoRAs
1:06:24 Determining optimal sampler methods
1:06:43 Image-to-image transformation techniques
1:08:43 Image editing and inpainting methodologies
1:10:38 Leveraging advanced segmentation for automatic image inpainting
1:15:55 Applying segmentation to existing images for inpainting with varied seeds
1:18:19 Detailed insights on upscaling, tiling, and SD3
1:20:08 Comprehensive explanation and resolution of seam issues
1:21:09 Utilizing the queue system
1:21:23 Multi-GPU configuration with additional backends
1:24:38 Low VRAM mode model loading
1:25:10 Rectifying color oversaturation issues
1:27:00 Optimal image generation configuration for SD3
1:27:44 Efficiently applying upscaling to previously generated images via presets
1:28:39 Exploring additional SwarmUI features
1:28:49 Understanding Clip tokenization and the rare token OHWX
Comprehensive Guide to Installing and Using Stable Swarm UI with Stable Diffusion 3
1. Introduction
In this comprehensive tutorial, we will explore how to install and use Stable Swarm UI, a powerful interface developed by Stability AI for working with Stable Diffusion models, including the recently released Stable Diffusion 3. This guide will cover everything from installation to advanced features, providing you with the knowledge to leverage this cutting-edge tool for AI image generation.
1.1 Overview of Stable Swarm UI
Stable Swarm UI is an official application developed by Stability AI that provides a user-friendly interface for working with various Stable Diffusion models, including the latest Stable Diffusion 3. It offers a wide range of features and capabilities that make it an excellent choice for both beginners and advanced users in the field of AI image generation.
1.2 Key Features Covered in This Tutorial
In this article, we will cover the following key aspects of Stable Swarm UI:
Installation process on Windows
Downloading and setting up Stable Diffusion 3 models
Basic image generation
Advanced features like segmentation and automatic inpainting
Using LoRAs (Low-Rank Adaptation) with Stable Swarm UI
The grid generator feature for comparing multiple parameters
Model downloader for easy access to CivitAI and Hugging Face models
Multi-GPU support
Image history and management features
Image-to-image and inpainting capabilities
Upscaling configurations and best practices
Advanced prompt syntax and wildcards
Presets for quick access to favorite settings
2. Installation and Setup
2.1 System Requirements
To install and run Stable Swarm UI effectively, you will need:
A Windows computer (this tutorial focuses on Windows installation)
A GPU with at least 6GB VRAM (more is better for improved performance)
Git installed on your system
.NET 8 installed on your system
2.2 Installation Steps
Download and install Git from the official Git website.
Download and install .NET 8 from the official Microsoft website.
Download the installation batch file from the Stable Swarm UI GitHub repository.
Create a new folder on your desired drive (avoid using spaces in the folder name).
Move the downloaded batch file into the newly created folder.
Double-click the batch file to start the installation process.
Follow the on-screen prompts to complete the installation.
2.3 Post-Installation Configuration
After the installation is complete, you will be presented with a web interface for further configuration. Here, you can customize various settings such as:
Choosing your preferred theme
Selecting which models to download initially
Configuring backend options (ComfyUI local is recommended for most users)
Once you've made your selections, click "Install Now" to finalize the setup.
3. Understanding Stable Diffusion 3
3.1 Model Architecture
Stable Diffusion 3 introduces several improvements over its predecessors:
It uses three models: Clip-G, Clip-large, and T5
The power of SD3 comes from the T5 XXL model
It features an improved VAE (Variational Autoencoder)
The U-Net is now composed of multiple MM-DiT blocks (Multi-Modal Diffusion transformer blocks)
3.2 Model Files and Text Encoders
When downloading Stable Diffusion 3, you'll encounter different file types:
Medium safetensors: The raw model containing MM-DiT blocks and VAE
Including Clips safetensors: Includes Clip-G and Clip-Large text encoders
Including Clips and T5 safetensors: Includes all three text encoders
FP16 and FP8 versions: Optimized for different hardware configurations
For this tutorial, we will download the base SD3 medium safetensors file, and Stable Swarm UI will handle the rest automatically.
4. Basic Usage of Stable Swarm UI
4.1 Generating Your First Image
To generate your first image using Stable Diffusion 3 in Stable Swarm UI:
Go to the "Generate" tab in the interface.
Select "Stable Diffusion 3 medium" from the model dropdown.
Enter a prompt describing the image you want to generate.
Set the desired resolution (1024x1024 is recommended for SD3).
Choose UniPC as the sampler and "normal" as the scheduler.
Enable both Clip and T5 text encoders for best results.
Click "Generate" to create your image.
4.2 Optimizing Generation Settings
For optimal results with Stable Diffusion 3, consider the following settings:
CFG Scale: 7 (can be adjusted based on image saturation)
Steps: 40
Sampler: UniPC
Scheduler: Normal
Text Encoders: Clip + T5
4.3 Understanding VRAM Usage
Stable Swarm UI is highly optimized for VRAM usage. With the recommended settings, it can run on GPUs with as little as 6GB VRAM. However, performance and capabilities will improve with more VRAM available.
5. Advanced Features of Stable Swarm UI
5.1 Presets
Stable Swarm UI allows you to create and save presets for quick access to your favorite settings:
Go to the "Presets" tab.
Click "Create New Preset."
Set your desired parameters, including prompt, model, and generation settings.
Give your preset a name and save it.
You can then easily apply these presets when generating new images.
5.2 Wildcards
Wildcards allow you to randomize parts of your prompt:
Go to the "Wildcards" tab.
Create a new wildcard list with different options (e.g., colors).
In your prompt, use the syntax __wildcard_name__ to incorporate the random selection.
This feature is great for generating diverse images with similar themes.
5.3 Grid Generator
The Grid Generator is a powerful tool for comparing different parameters:
Go to the "Tools" tab and select "Grid Generator."
Choose the parameters you want to compare (e.g., steps, CFG scale, samplers).
Set the ranges or options for each parameter.
Click "Generate Grid" to create a comparison of images with different settings.
This feature is invaluable for finding the optimal settings for your specific use case.
5.4 Automatic Segmentation and Inpainting
Stable Swarm UI offers an advanced feature for automatic segmentation and inpainting:
Generate an image or upload an existing one.
In the prompt, use the syntax segment:part_to_change:new_description (e.g., segment:eyes:blue glowing eyes).
Adjust the segmentation threshold and mask settings if needed.
Generate to automatically mask and change the specified part of the image.
This feature allows for targeted editing without manual masking.
6. Working with LoRAs and Custom Models
6.1 Downloading and Installing LoRAs
To use LoRAs with Stable Swarm UI:
Go to the "Utilities" tab and select "Model Downloader."
Paste the Hugging Face or CivitAI link for the LoRA you want to download.
Choose a name for the LoRA and click "Download."
The LoRA will be automatically placed in the correct folder.
6.2 Applying LoRAs to Generations
To apply a LoRA to your generations:
In the "Generate" tab, find the "LoRAs" section.
Select the LoRA you want to use.
Adjust the strength of the LoRA effect (usually between 0.5 and 1).
Generate your image as usual.
You can also activate LoRAs directly in the prompt using the syntax <lora:lora_name:strength>.
7. Upscaling and Image Refinement
7.1 Best Practices for Upscaling
When upscaling images with Stable Diffusion 3, keep in mind:
SD3 cannot generate images larger than its trained resolution (1024x1024).
Use tiling for better results, but be aware of potential seams.
Adjust the refiner control percentage (denoise strength) to balance detail and artifacts.
7.2 Recommended Upscaling Settings
For optimal upscaling results:
Refiner control percentage: 30-35%
Refiner steps: 40
Refiner method: Post apply
Upscale factor: 1.5x
Enable tiling
Use a high-quality upscaler model (e.g., 4xLSDIRplusC)
7.3 Dealing with Color Saturation
If you encounter oversaturated colors:
Reduce the CFG scale (try 5 instead of 7).
Generate multiple images to find a balance between color accuracy and prompt adherence.
8. Image History and Management
8.1 Using the Image History Feature
Stable Swarm UI provides a powerful image history feature:
Access it from the "Image History" tab.
Browse through all generated images, sorted by date or name.
Filter images by prompt or other parameters.
Quickly reuse settings from previous generations.
8.2 Organizing and Filtering Images
To keep your generations organized:
Use the folder structure provided by Stable Swarm UI.
Utilize the search function to find specific images.
Star your favorite images for easy access.
Use the delete function to remove unwanted generations directly from the interface.
9. Multi-GPU Support
9.1 Setting Up Multiple GPUs
To utilize multiple GPUs with Stable Swarm UI:
Go to the "Server" tab and select "Backends."
Add a new ComfyUI self-starting backend for each additional GPU.
Set the GPU ID for each backend to correspond to your system's GPU numbering.
Save the configuration and restart Stable Swarm UI.
9.2 Managing Multi-GPU Workflows
When using multiple GPUs:
Stable Swarm UI will distribute generation tasks across available GPUs.
Monitor the server logs to see which GPU is handling each task.
You can generate multiple images simultaneously, one on each GPU.
10. Advanced Prompt Techniques
10.1 Understanding Token Weights
Stable Swarm UI supports advanced prompt weighting:
Use parentheses to group words or phrases.
Add a colon and number to adjust the weight (e.g., (blue eyes:1.2)).
Experiment with different weights to fine-tune your results.
10.2 Utilizing Negative Prompts
Negative prompts help refine your generations:
Use the negative prompt field to specify what you don't want in the image.
Combine positive and negative prompts for more precise control.
10.3 Prompt Alternation and Randomization
For more diverse results:
Use the [option1|option2] syntax to randomly choose between options.
Employ the {option1|option2} syntax for ordered alternation.
11. Troubleshooting and Community Support
11.1 Common Issues and Solutions
If you encounter issues:
Ensure your GPU drivers are up to date.
Check that you have the latest version of Stable Swarm UI installed.
Verify that all required dependencies (Git, .NET 8) are correctly installed.
Consult the official documentation for known issues and workarounds.
11.2 Accessing Community Support
For additional help:
Join the official Stable Swarm UI Discord server.
Participate in community forums and discussions.
Check the GitHub repository for recent updates and bug fixes.
12. Conclusion
Stable Swarm UI, combined with Stable Diffusion 3, offers a powerful and user-friendly platform for AI image generation. By mastering the features and techniques outlined in this guide, you'll be well-equipped to create stunning, high-quality images and push the boundaries of what's possible with AI art generation.
Remember to experiment with different settings, prompts, and models to find the perfect combination for your specific needs. As the field of AI image generation continues to evolve rapidly, stay connected with the community and keep an eye out for new features and improvements to Stable Swarm UI and Stable Diffusion models.
With practice and creativity, you'll be able to harness the full potential of this incredible tool and produce amazing AI-generated artwork. Happy creating!
Comments